Administration
Overview
Administration is done in the FlexIt web application as shown here:

User Management
Adding Users
New users can be added by clicking the New Users button and doing one of the following:
- Bulk User Upload – from a .csv file
- Add Individual User – enter username, fullname, and role. The user will be emailed a link to set their own password (if using FlexIt authentication).
Users can also Self-register from the Login page by clicking on the Register link. This will send an email to Admin users and will also show “1 new user request” when the Admins log into the FlexIt portal. Once the user has been approved, they will be emailed a link to set their own password (if using FlexIt authentication).
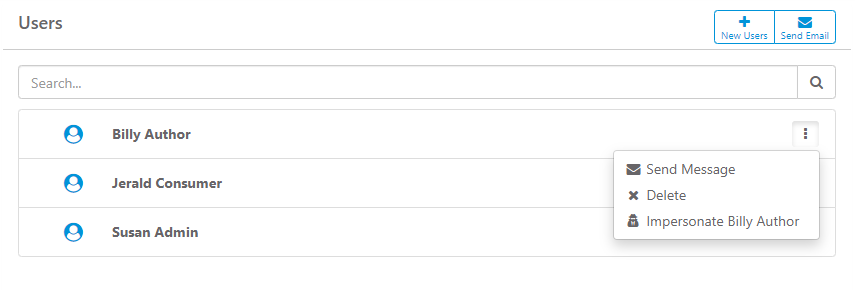
Email Users
Send custom emails to all FlexIt users by clicking Send Email at the top of the Users page, or send to individual users from the ellipsis next to the user name.
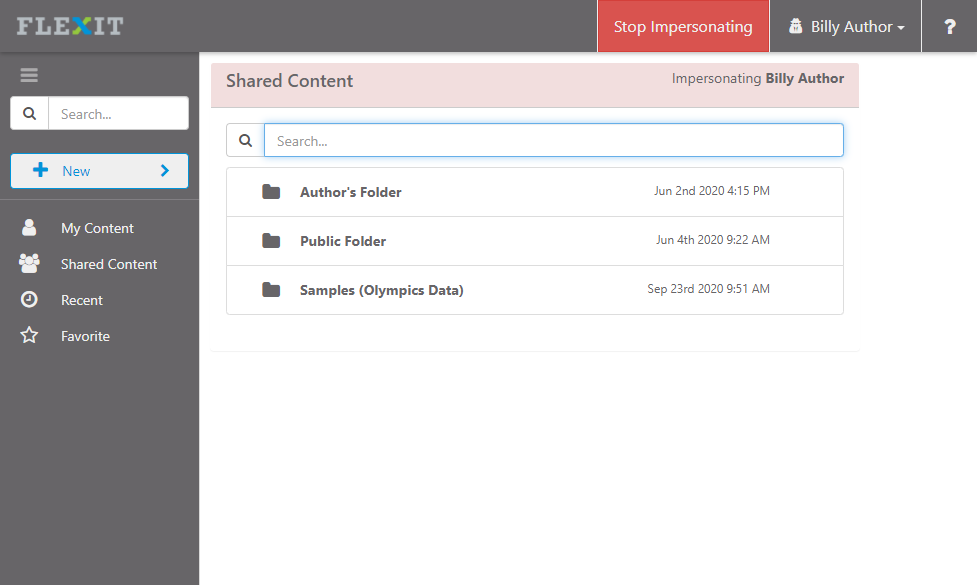
Impersonate User
Administrators can impersonate individual users, which gives them the ability to see FlexIt exactly as that person sees it. This is helpful for ensuring everything works as expected when securing folders, reports, FlexIt features, and more. When impersonating, you'll see that person's name in the top-right and you will not be able to edit or save any of that users content. Click Stop Impersonating at the top-right to get back to your regular user profile.
Groups & Roles
Roles define what features of FlexIt users have access to. Groups define what data and content (folders, reports, dashboards, etc.) a set of users has access to. Both groups and roles can be used to secure content and data, but only roles can define application functionality (e.g. create new dashboard).
FlexIt has default groups and roles that cannot be modified or removed:
- Admin - Full control over entire application
- Author - Ability to create, browse, and run reports
- Consumer - Ability to browse and run reports
- Authenticated - All authenticated users. Anyone that can log into FlexIt is in this group. Users cannot be individually assigned to this group.
- Public - Everyone, no authentication required. See note below.
Public Group - to use the Public group, you must enable the Allow Public Access? setting under Administration > Configuration > Authentication
Adding Groups
New groups can be added by clicking the New Group button at the top of the Groups & Roles page. Once the group is added, you can then add users and/or groups to this group. When you add groups to groups, you are nesting them, which gives child groups access to everything the parent group has access to.
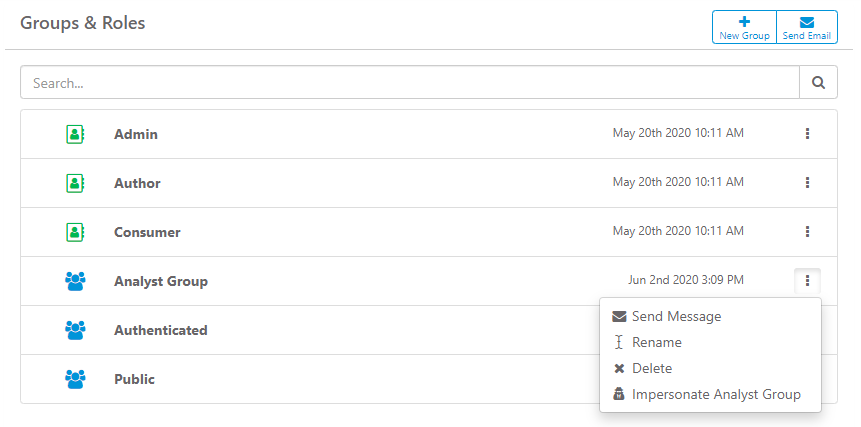
Email Groups
Send custom emails to users in a group by clicking the ellipsis next to the group name and selecting Send Message.
Impersonate Group/Role
Administrators can impersonate a group/role, which gives them the ability to see FlexIt exactly as a person in that group/role sees it. This is helpful for ensuring everything works as expected when securing folders, reports, FlexIt features, and more. To impersonate a group, click on the ellipsis next to the group and select Impersonate XYZ Group.
Data Sources
Data sources are the connection details for the underlying databases and other sources used to pull data for reporting.
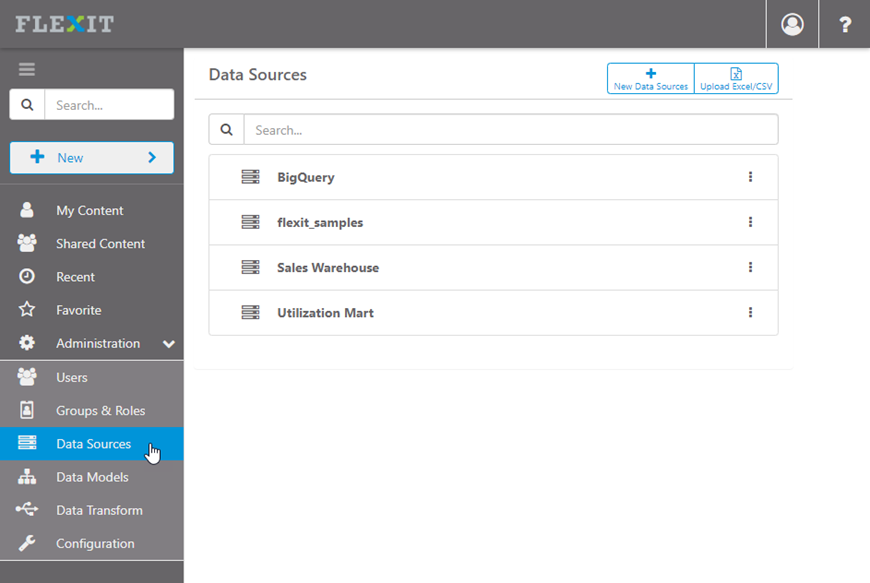
Best practice: Encrypt sensitive information, such as passwords
Data Models
Data models are the presentation layer (a.k.a business view, metadata layer) the report and dashboard authors see when they create new content. Data models connect to underlying data sources and define metadata such as relationships between entities, user-friendly names (e.g. First Name instead of F_NAME), calculations, formatting, drill paths, and more. See the Data Models (Business Views)” knowledge base article for detailed instructions on how to create metadata models.
Read the full guide: Data Models (Business Views)
Securing Content
Data Models and content (folders, reports, dashboards) can be secured at the user or group/role levels. To apply security, locate the item, click the ellipsis to the right, and select Security.
There is no need to assign the Admin role to data models or other content since it has access to everything.
Data Model Security
When a data model is first created, only the Admin role has permissions. Add users, groups and roles to the desired data model. Data model security overrides Content Security. For example, if you give permission for a group to access a specific report, that group must also have access to the data model otherwise they will be denied access.
Content Security
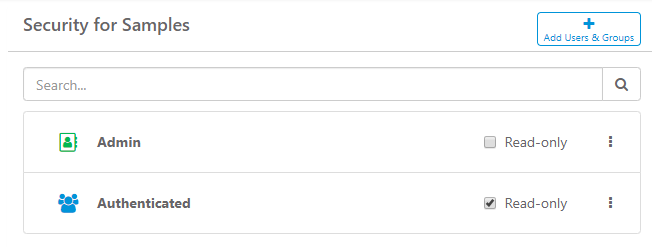
Add users, groups and roles to the desired folders, reports and dashboards. You can assign security at the Shared Content level (highest) down to individual content items (lowest).
If no security is applied to lower-level items, then security is inherited from higher-level items. In the example below, security for the Samples (Olympic Data) folder is inherited from Shared Content.
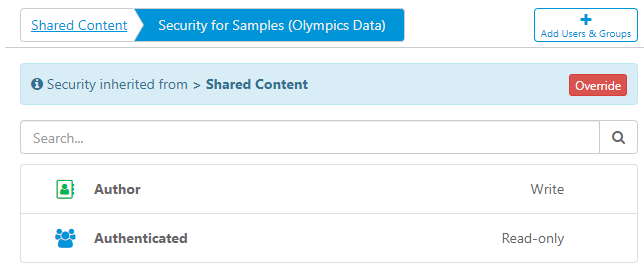
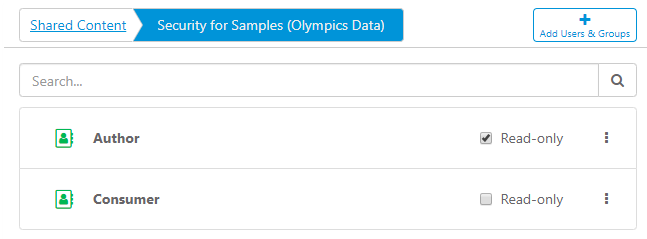
To apply security on the Samples (Olympic Data) folder, click the red Override button at the top-right and add desired users, groups and roles. Once added, click the Read-only checkbox if you want them to have read-only access. Read-only access prevents from creating, editing, or removing any content.
Configuration
The FlexIt configuration settings can be managed under the “Administration > Configuration” menu, as shown here:
Details for each of the configuration settings can be found below.
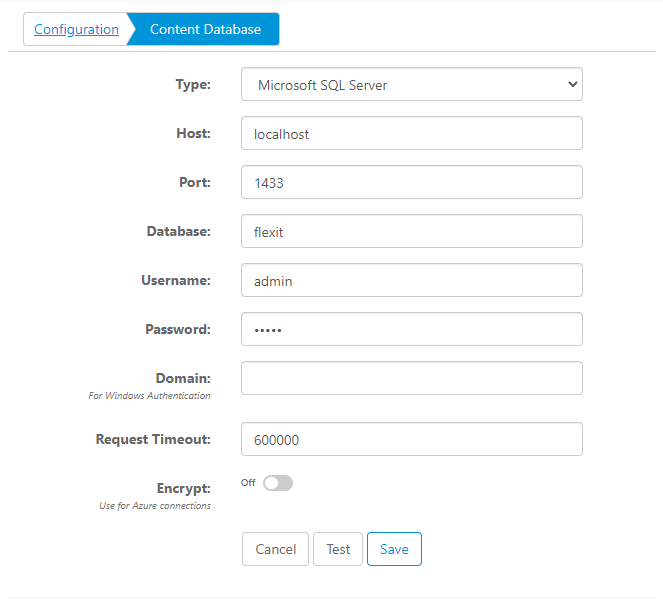
Content Database
The content database is where everything (reports, dashboards, users, groups, folders, etc.) is stored. By default, FlexIt comes with an enterprise-grade PostgresSQL deployment that is production-ready. See the "Deploy FlexIt Server" knowledge base document for details on managing this database. If you do not use the default database, or would like to change to another database, you can change the settings under “Configuration > Content Database,” as shown below:
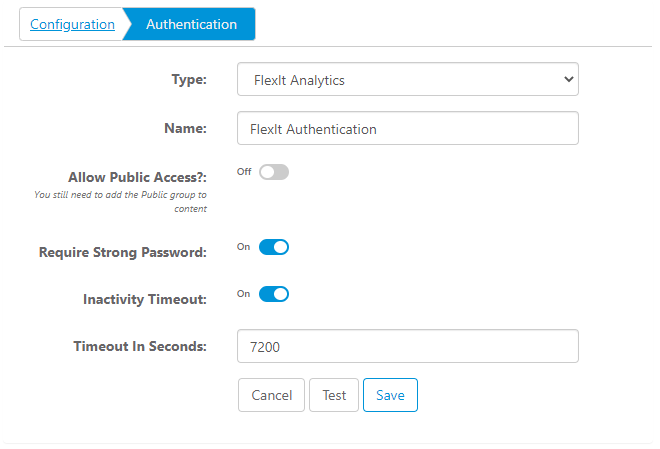
Authentication
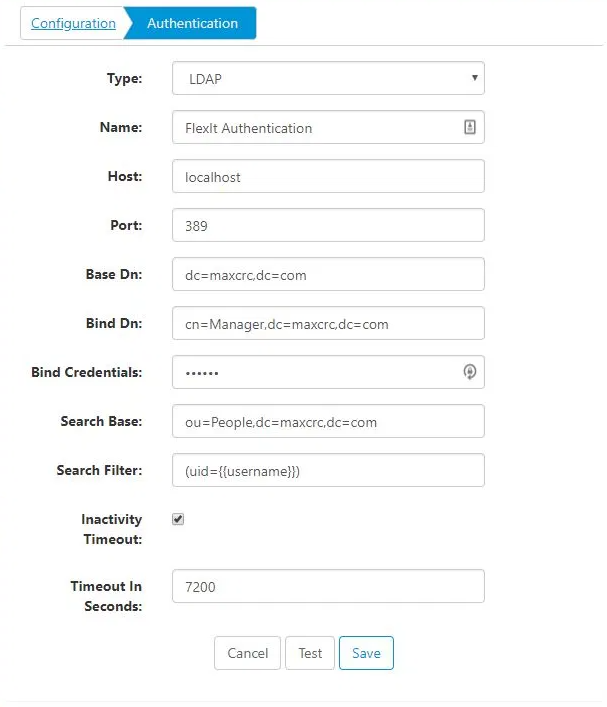
By default, authentication is handled by storing secured credentials in the FlexIt Content Store database. You may also use other authentication methods like LDAP (Lightweight Directory Authentication Protocol), Active Directory, or SAML based Single Sign On from providers like Okta, OneLogin, etc. Each method is shown below:
FlexIt Authentication
LDAP/Active Directory
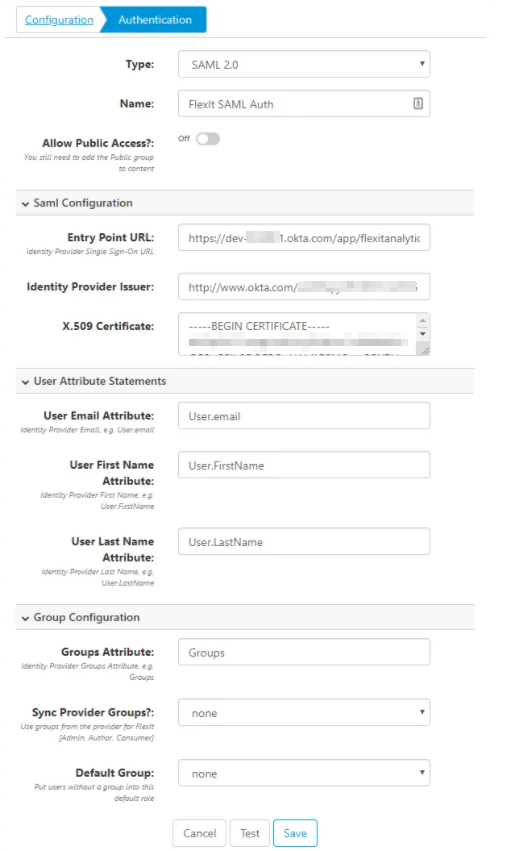
SAML Single Sign On Provider
See also:
For the “SAML Configuration” section, the identity provider (Okta, OneLogin, etc.) will provide you with the following when you set up a new application in their tool:
- Entry Point URL, also called “Identity Provider Single Sign-On URL” or “ACS (Consumer) URL”
- Identity Provider Issuer, also called “Issuer URL”
- X.509 Certificate
The “User Attribute Statements” and “Group Attribute Statements” should match the names used in step 7 above. Note the following options:
- “Sync Provider Groups?” defaults to “none”. Set it to “seed” if you want FlexIt to automatically assign the user group ONLY on the first login. Set it to “sync” if you always want FlexIt to use the Okta groups. If you use “seed” or “sync”, FlexIt will automatically assign the Okta group “FlexIt Admin” to the “Admin” role, “FlexIt Author” to the “Author” role, and “FlexIt Consumer” to the “Consumer” role. Note that the Okta group names must be assigned to the FlexIt Analytics application and exactly match FlexIt [Admin, Author, Consumer].
- “Default Group” defaults to “none”. If a user is assigned to the FlexIt Analytics application in Okta, but is not part of any Okta groups, you can automatically assign them either as a “Consumer” or “Author” in FlexIt.
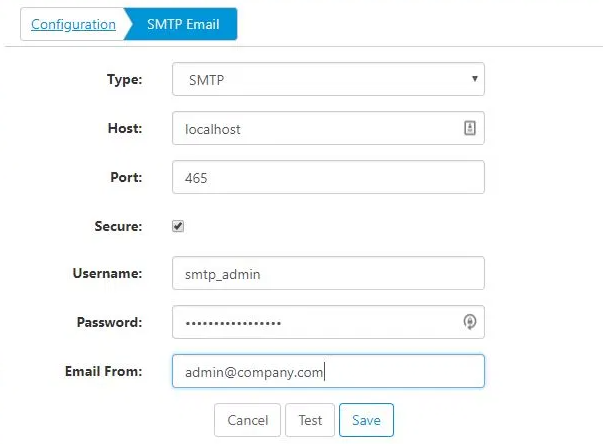
SMTP Email
Warning: To properly secure your email transmissions, configure your own SMTP server!
By default, FlexIt comes with a development SMTP server configuration so that you don’t have to configure anything to test FlexIt. For production purposes and to properly secure your email transmissions, you may want to use your own SMTP server. Configuration details are shown below:
Server Settings
Set the host name, port, number of processes to use for load balancing, logging level, or enable/disable the HTTPS/SSL and the REST API.
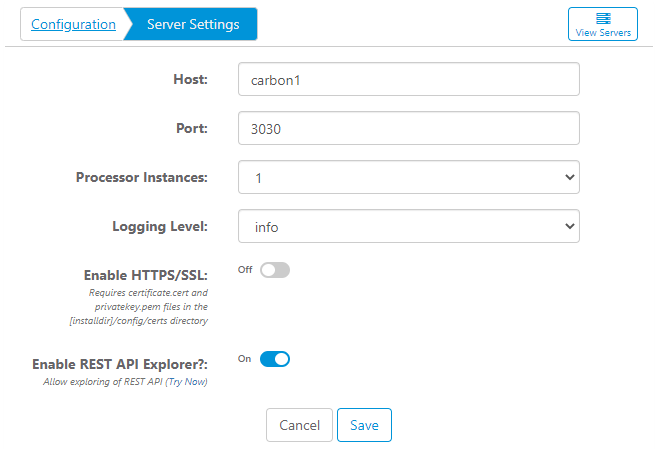
Click the View Servers button at the top to manage the individual server processes.
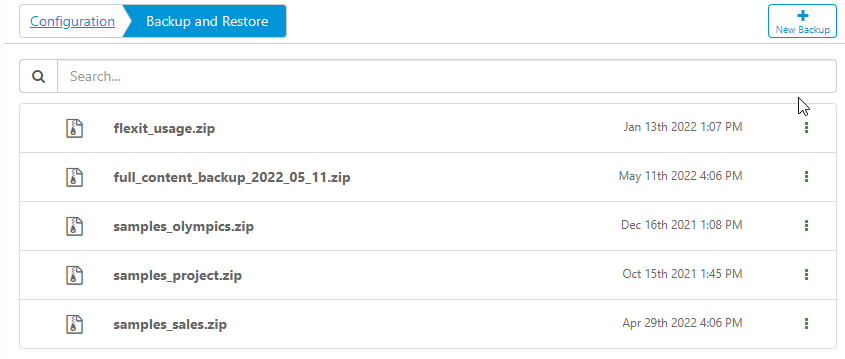
Backup and Restore
Back up and restore the entire content database, or individual reports, folders, dashboards, models, etc. Backups are stored in physical .zip files on your server under the "[flexit_home]/deployments” directory.
Maps
Manage map styles or data points such as GeoJSON and latitude/longitude.
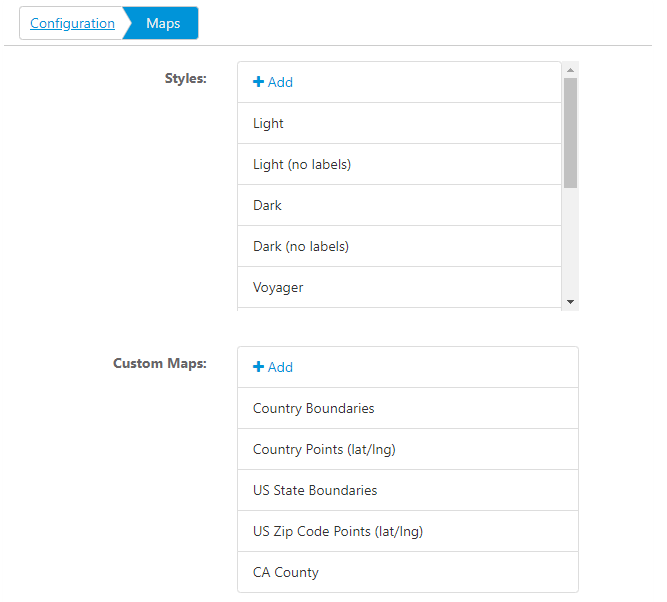
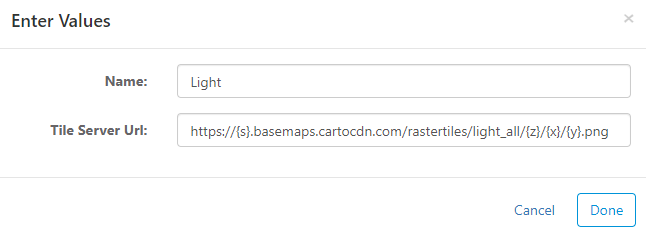
Styles
Map styles allow you to use map tiles from any server, such as Open Street Map, Carto DB, and Mapbox. Some services, such as Mapbox, will require an access_token in the tile server URL. By default, FlexIt comes with a lot of free tile servers.
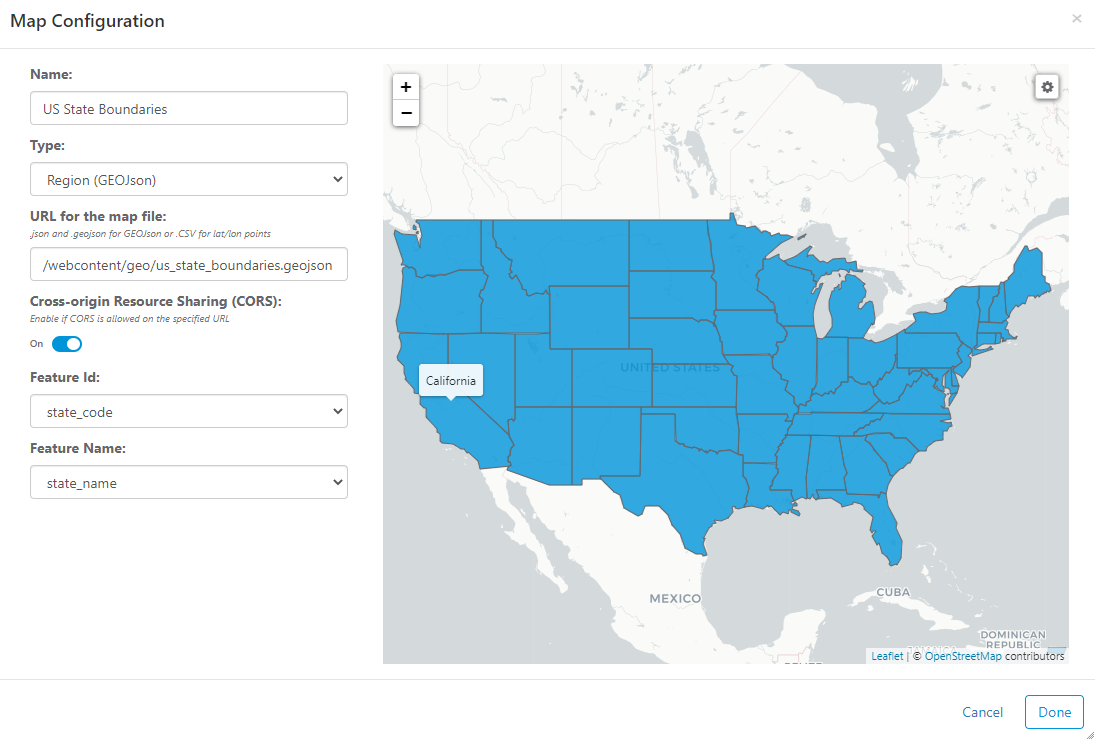
Custom Maps
You can create any type of map that can be imagined using GeoJSON or Latitude/Longitude sources. FlexIt comes preloaded with country boundaries, country lat/lon, United States boundaries, and United States lat/lon. You can add your own maps from remote servers or add maps to the "[flexit_install]\webcontent\geo" directory. Configure maps as shown below.
Integrations
Enter details for integration with external third-party applications.

Samples
FlexIt comes packaged with three sample packages that comes with reports & dashboards, metadata model, and data. You can deploy the samples the same way you deploy a backup, using the Backup and Restore feature.
HTTPS
To enable https on the server, you must place both the Private Key and Certificate file on the server under the “[flexit_home]/config/certs” folder.
- Private Key: the key must be in a PEM file named “privatekey.pem”
- Certificate: the certificate can be in a file named “certificate.pem” or “certificate.cert”
The private key and certificate must be in PEM format. If you have something like a p7b file, you can convert it to PEM using OpenSSL with the following command:
To create the certificate, copy everything between the first instace of the below lines into a new file named “certificate.pem” or “certificate.cert”.
To create the private key, copy everything between the below lines into a new file named “privatekey.pem”.
Once the files are in place, you can enable https by going to the Server Settings page and checking the “Enable HTTPS” checkbox. You can also set the port to 443 (default) or any other port.
Restart the server for changes to take affect.
Note: You may also need to change the port to 443, see the Server Settings administration section.
PDF Download
To enable PDF download of reports, dashboards, and data portals, a chromium browser (e.g. Google Chrome) must be installed on the FlexIt server. FlexIt will look for the chromium binary executable in the following order:
- Using the
CHROMIUM_PATHenvironment variable - On Windows:
C:\Program Files\Google\Chrome\Application\chrome.exeorC:\Program Files (x86)\Google\Chrome\Application\chrome.exe - On Linux:
/usr/bin/chromium-browser
Encryption
To encrypt sensitive information, set the environment FLEXIT_ENCRYPTION_KEY variable on the FlexIt server to a 32-character string. You can use a secure random key generator such as Open SSL to generate the key.
For example, the following Open SSL command will randomly generate a 32-character key:
Do not to lose this key because you cannot decrypt connection details without it. If you lose (or change) it, you will have to reset all of the connection details that have been encrypted.
REST API
Every component can be access via a fully documented REST API. To access the REST API from FlexIt, go to Server Settings, click "Enable REST API Exporer", and then save. Then, you can click Try now on the Server Settings page, or simply append /exporer to the FlexIt server hostname (e.g. http://flexitserver/explorer/).