Data Models (Business Views)
Overview
Data modeling is the process of creating “business views” in order to make self-service analytics possible for everyone in the organization. At a high level, this is where you give database tables and attributes user-friendly names (e.g. F_NM becomes First Name), specify relationships between entities (i.e. joins), and create re-usable calculations. This allows SQL to be automatically generated when users drag-and-drop fields from multiple entities on reports. Taking the extra steps to enter user-friendly labels and calculations means that users won’t have to do this on every report they create. The following sections will walk you through the process of creating a new model.
1) Create a Data Source
Prior to creating a metadata model, you’ll need to create a data source that the model will pull tables/columns from. Data Sources are created via the Administration menu in the FlexIt portal. More details can be found in the “Data Sources” section of the Administration knowledge base article.
See also: Administration > Data Sources
2) Create a Data Model
New Data Model
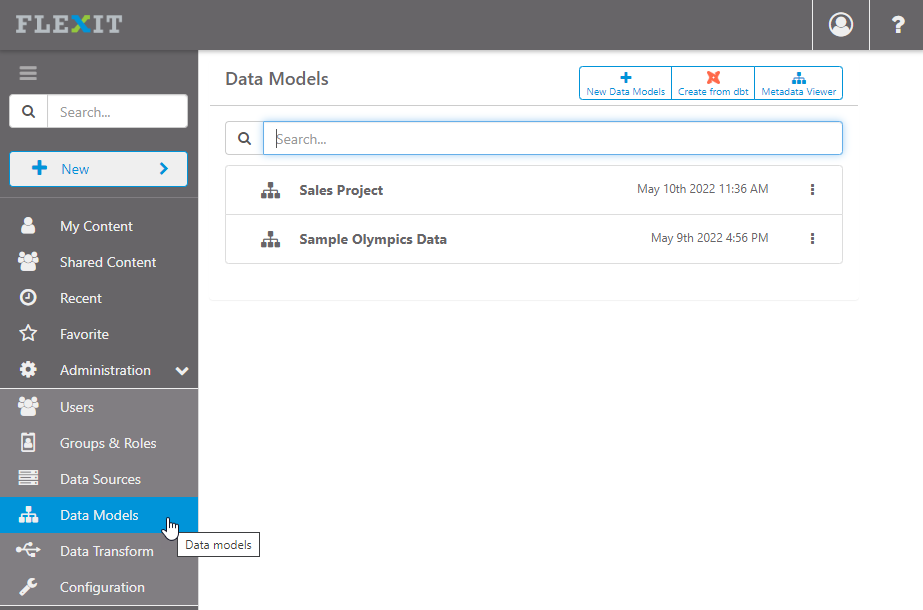
Data Models are created via the Administration menu in the FlexIt portal. To create a new metadata model, click the New Data Model button in the top-right of the Data Models screen. Now, select the Data Source that you would like this model to connect to.
Create from dbt
Use the dbt data transformation tool to provide the metadata layer. See the FlexIt dbt guide for details.
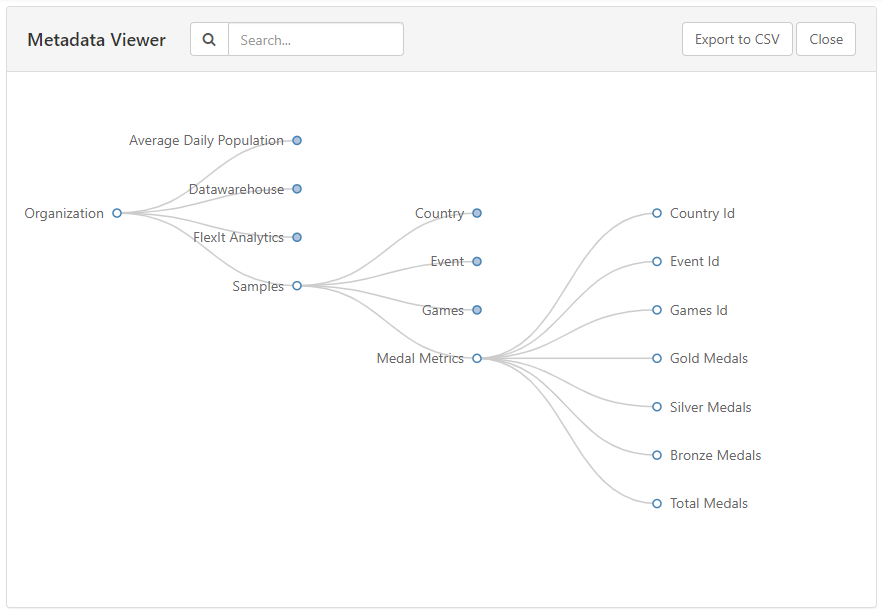
Metadata Viewer
Next to the New Data Model button, click the Metadata Viewer button to browse all your organizations' data models.
Data Model Editor
When creating a new model or editing an existing model, you’ll notice that there are 3 distinct sections of the Data Model editor shown and described in detail below:
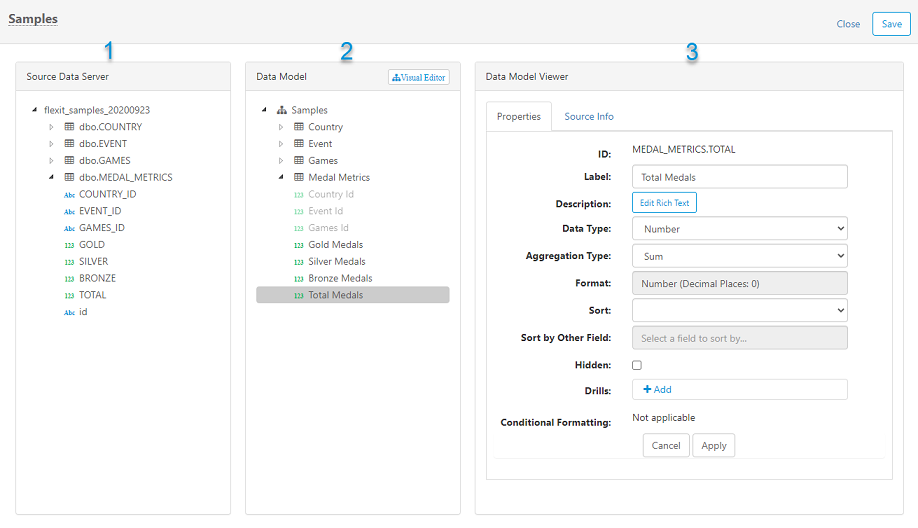
- Source Data Server – drag entities or attributes from here into the Data Model area on the right
- Data Model – this is your metadata model. You’ll drag items from the Source Data Server into here, give items nice labels and descriptions, create joins/relationships, calculations, SQL entities, and more.
- Data Model Viewer – when you click on items in the Data Model, this is the editor pane where you make changes to properties (e.g. label, aggregation, formatting, etc.)
Building a Metadata Model
The main tasks involved in building the model are dragging in relevant Data Source items, giving them nice labels, descriptions, formatting, and then creating joins/relationships, calculations, SQL entities. These tasks are detailed in the following sections.
Bringing in Data Source items
Drag-and-drop items from the Source Data Server pane into the Data Model pane.
Tip - Use CTRL or SHIFT-click to select multiple items at once
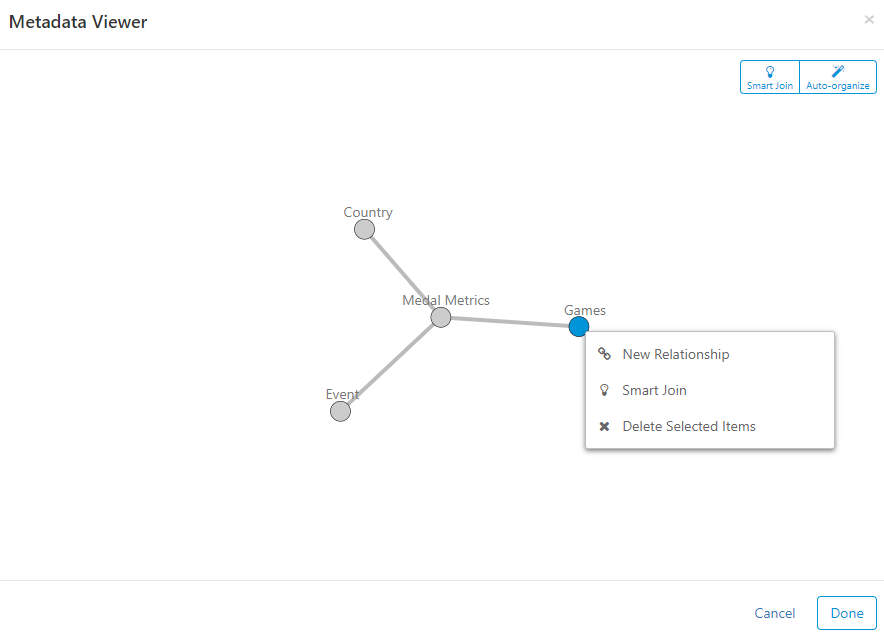
Joins (i.e. Entity Relationships)
Once you’ve brought items into the Data Model pane, the Visual Editor button allows you to create relationships between entities. In the top-right, use the “Smart Join” button to automatically detect relationships between entities and the “Auto-organize” button to neatly organize all the entities and relationships. Right-click on entities or relationships to make changes or create new ones. Here’s a screenshot of what it looks like when you use the Smart Join:
Editing item properties
In the main data model design page (i.e. not the Visual Editor), you can click on entities or attributes to edit in the Data Model Viewer pane. You can also right-click on items for quick access to more functions.
Tip - Right-click on an item, or the entire model, and use the "Smart Auto-naming" feature to give user friendly names to your entities/tables and attributes/columns.
Entity – If you click on an entity/table, you can edit the label and description in the Properties tab. The Source Info tab shows you details about the source table. Lastly, the Relationships tab allows you to create joins between entities.
Attribute – If you click on an attribute/column, you can edit properties or look at database Source Info. Here are details on the properties you can edit:
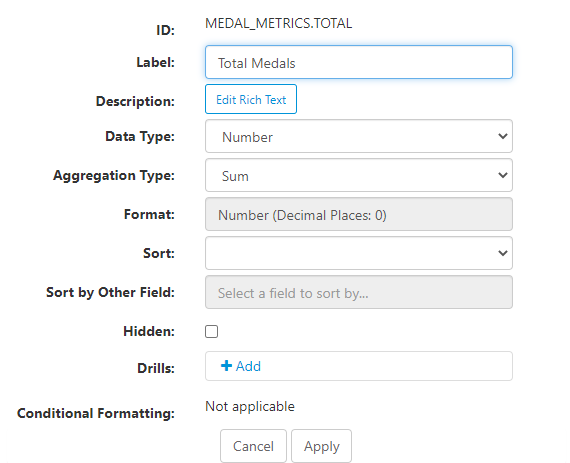
- Label – name that will appear for users to see
- Description – information that will appear when a user hovers over the info icon of a field
- Data Type – should it be treated as a Number, Date, or String
- Aggregation Type – aggregation such as sum, average, min, max. Count and count distinct can be used on numbers, dates, or strings. Advanced allows you to see different aggregations types at various grouping levels.
- Format – number, date, currency, percent, and text.
- Sort – ascending, descending, or none.
- Sort by Other Field – you may want to sort by a field that is not visible on the report. For example, you want to sort by Person Id but show only Person Name.
- Hidden – hides field from being displayed to users.
- Drills – use this if a field should always drill to a specific report. You may have a generic report with the lowest level of detail and lots of column that you want to be the destination when clicked on from any source report.
Calculations
Right-click on any entity or attribute in the Data Model pane to create a calculated field. This is highly recommended for common calculations that are not already a field/column in the database table.
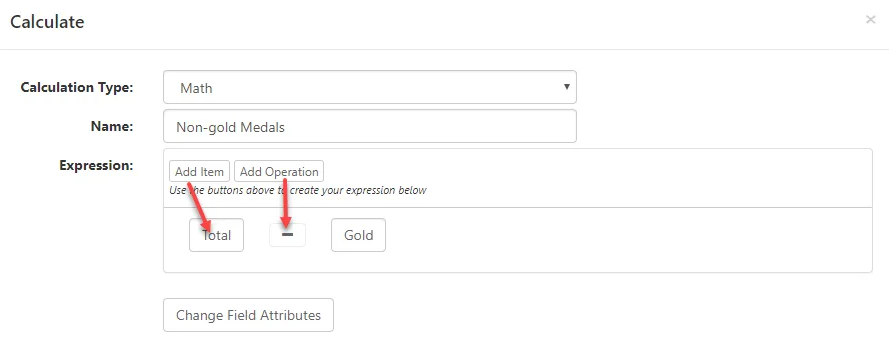
Math
Use math calculations for basic operations such as addition, subtraction, multiplication, and division. You can click “Add Item” to use as many fields or constants as you would like in the calulation. Click “Add Operation” to add as many operations as you need. The screenshot below shows a basic math calculation:
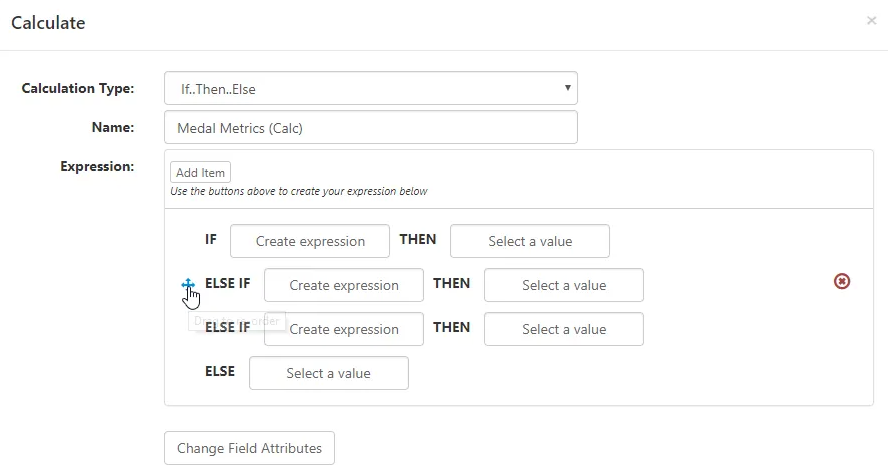
If Then Else (Case Logic)
Equivalent to a case statement in SQL, the If..Then..Else calculation allows you to create complex field calculations based on specified logic. You can create new fields that group attributes (e.g. If items are “dog, cat, fish” then “Animal” Else If items are “tree, bush” then “Plant”), or new metrics (e.g. “Prior Year Golds” as If year=year-1 Then [Gold Medals] Else 0). Click the “Add Item” button to add more ELSE IF THEN lines to the statement.
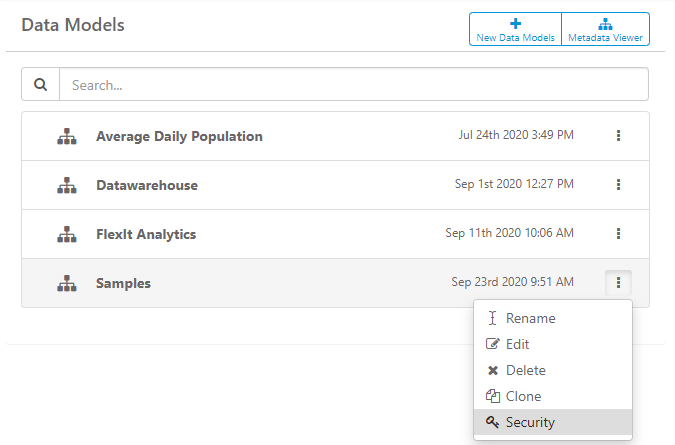
3) Secure the Data Model
After you Save the data model, it is only accessible by the “Admin” role by default. In order to allow other groups, roles, or users to access this metadata model for reporting and dashboarding, you will need to give them permission by setting the “Security”, as shown below: