SAML with metadata.xml
With your SAML provider (Microsoft Entra ID, Shibboleth, Okta, OneLogin, Duo), create an app for the FlexIt Analytics application. Then, upload the XML metadata (code shown below) with the following entries changed:
- entityID - you can use any identifier here, but it typically looks like
entityID="https://yourdomain.com/data/flexit/sp", where yourdomain.com is your organizations domain hostname. - Location - this setting is the FlexIt server installation "Callback URL". In the
Location="https://flexit_server_url/auth/callback"setting, replace flexit_server_url with the hostname URI of the installed FlexIt Analytics server instance.
SAML in Okta
Set up SAML single sign-on in Okta.
The first step in configuring an application to support SAML based Single Sign-On from Okta is to set up an application in Okta.
In SAML terminology, what you will be doing here is configuring Okta (your SAML Identity Provider or “SAML IdP”), with the details of your application (the new SAML Service Provider or “SAML SP”).
Here is how to set up a SAML application in Okta:
Log in to your Okta organization as a user with administrative privileges. If you don’t have an Okta organization, you can create a free Okta Developer Edition organization.
Click on the Applications link in the menu
Click on the Create App Integration button
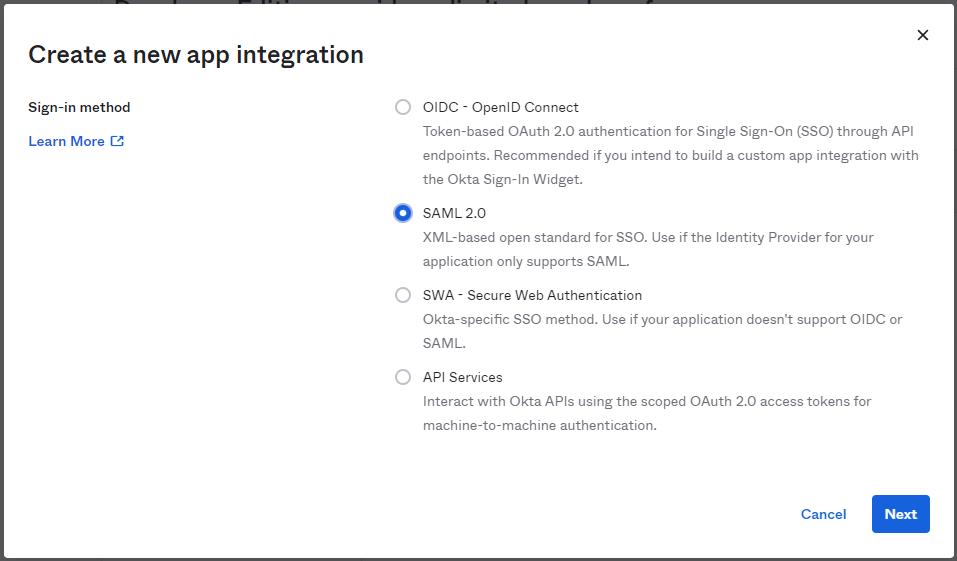
In the dialog that opens, select the “SAML 2.0” option and then click Next
In Step 1 “General Settings”, enter “FlexIt Analytics” in the “App name” field

Upload the FlexIt app logo, then click the Next button.

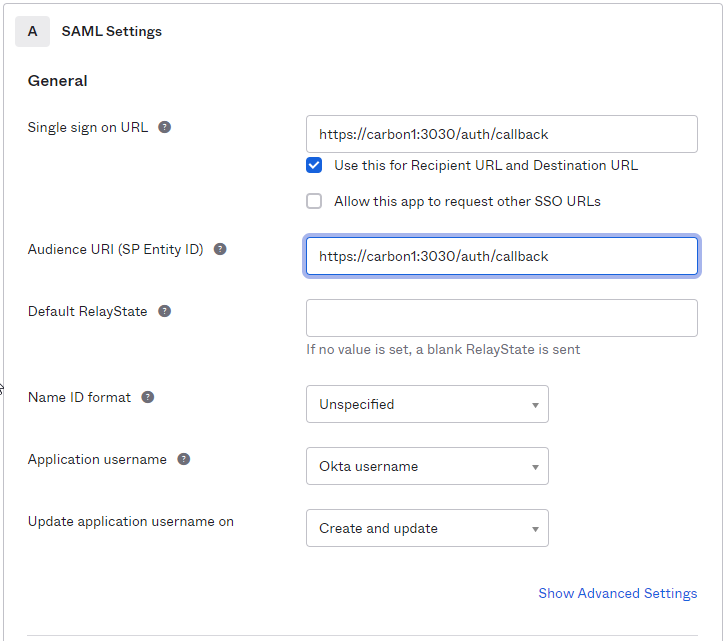
In Step 2 “Configure SAML,” section A “SAML Settings”, paste the URL below into the “Single sign on URL” and “Audience URI (SP Entity ID)” fields. The FlexIt URL will be in the form of protocol://servername:port/auth/callback, for example: https://carbon1:3030/auth/callback
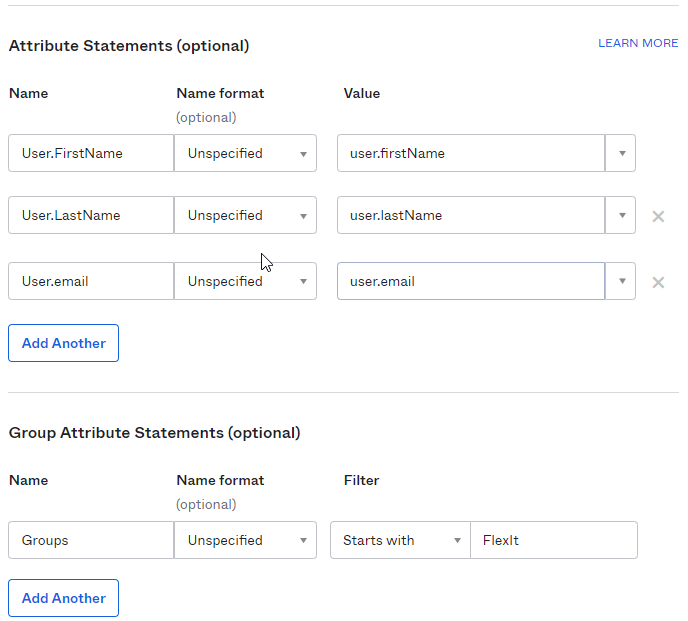
In the “Attribute Statements” section, add three attribute statements. In the “Group Attribute Statements”, add one statement:
- Attribute Statements
- “User.FirstName” set to “user.firstName”
- “User.LastName” set to “user.lastName”
- “User.email” set to “user.email”
- Group Attribute Statements
- “Groups” set to “Starts with” text of “FlexIt”
- Click Next to continue
- Attribute Statements
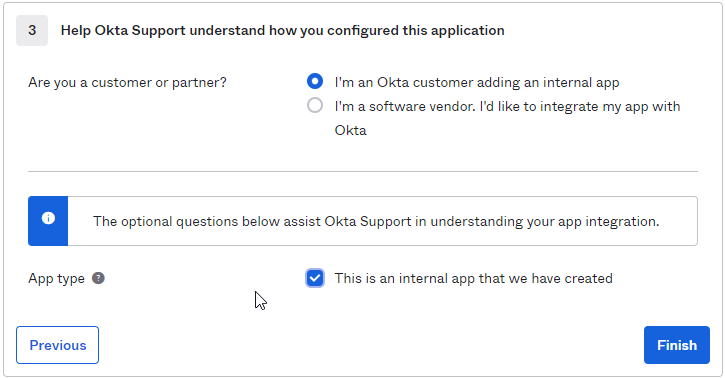
In Step 3 “Feedback”, select “I’m an Okta customer adding an internal app”, and “This is an internal app that we have created,” then click Finish.
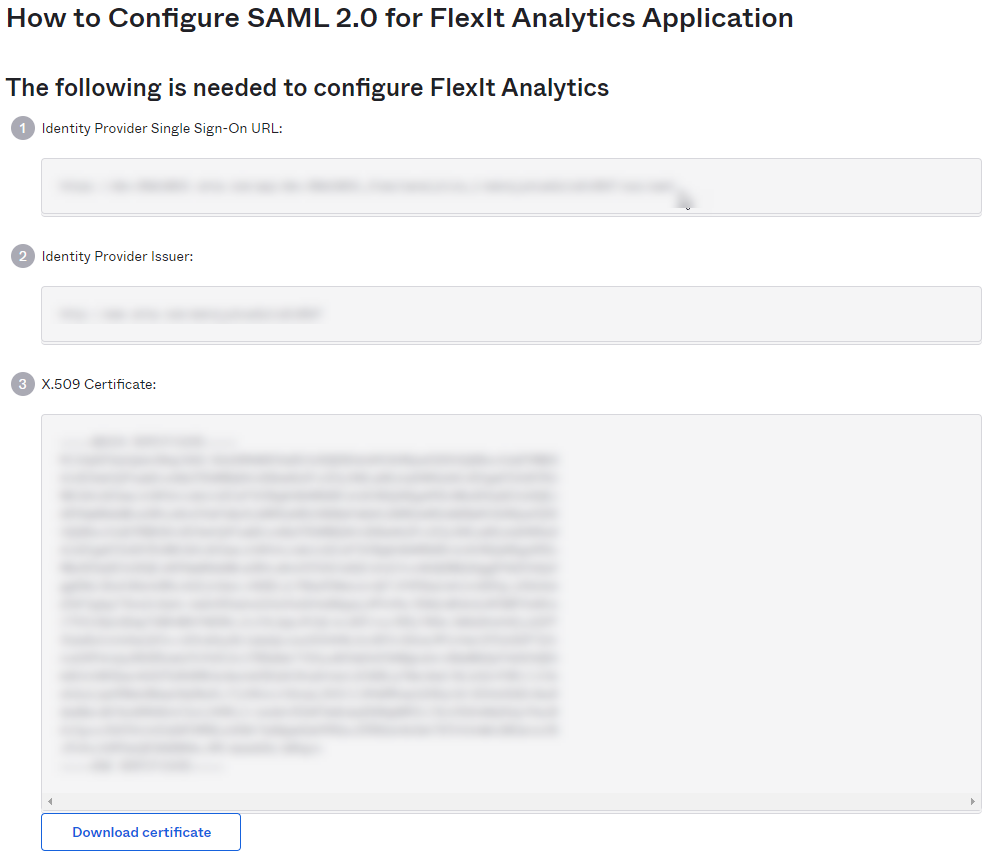
The “Sign On” section of your newly created “FlexIt Analytics” application appears. Click on “View Setup Instructions”
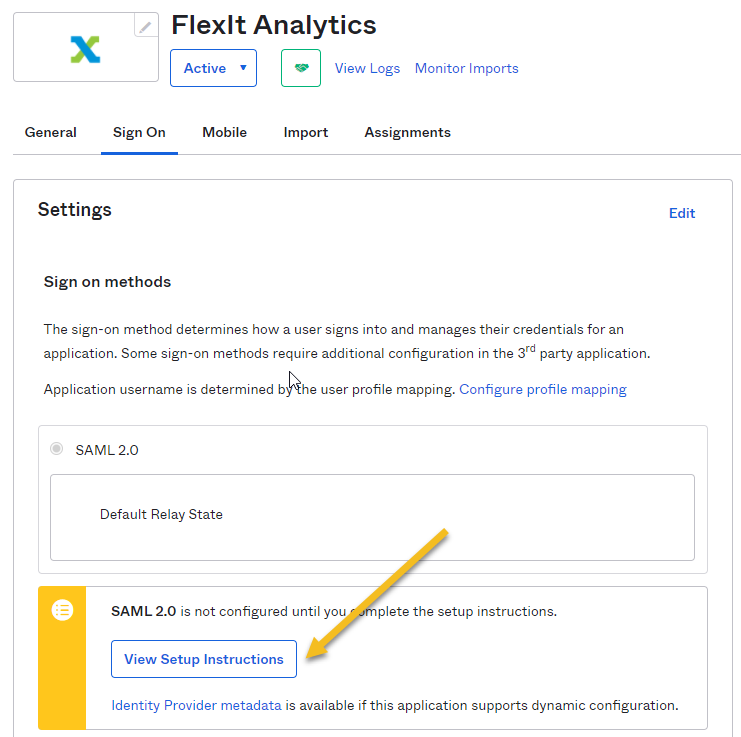
Keep this page open in a separate tab or browser window. You will return to this page later in this guide and copy the 3 settings into the FlexIt Configuration
Log in to FlexIt as an Administrator, click on “Configuration” under Administration, then click “Authentication”
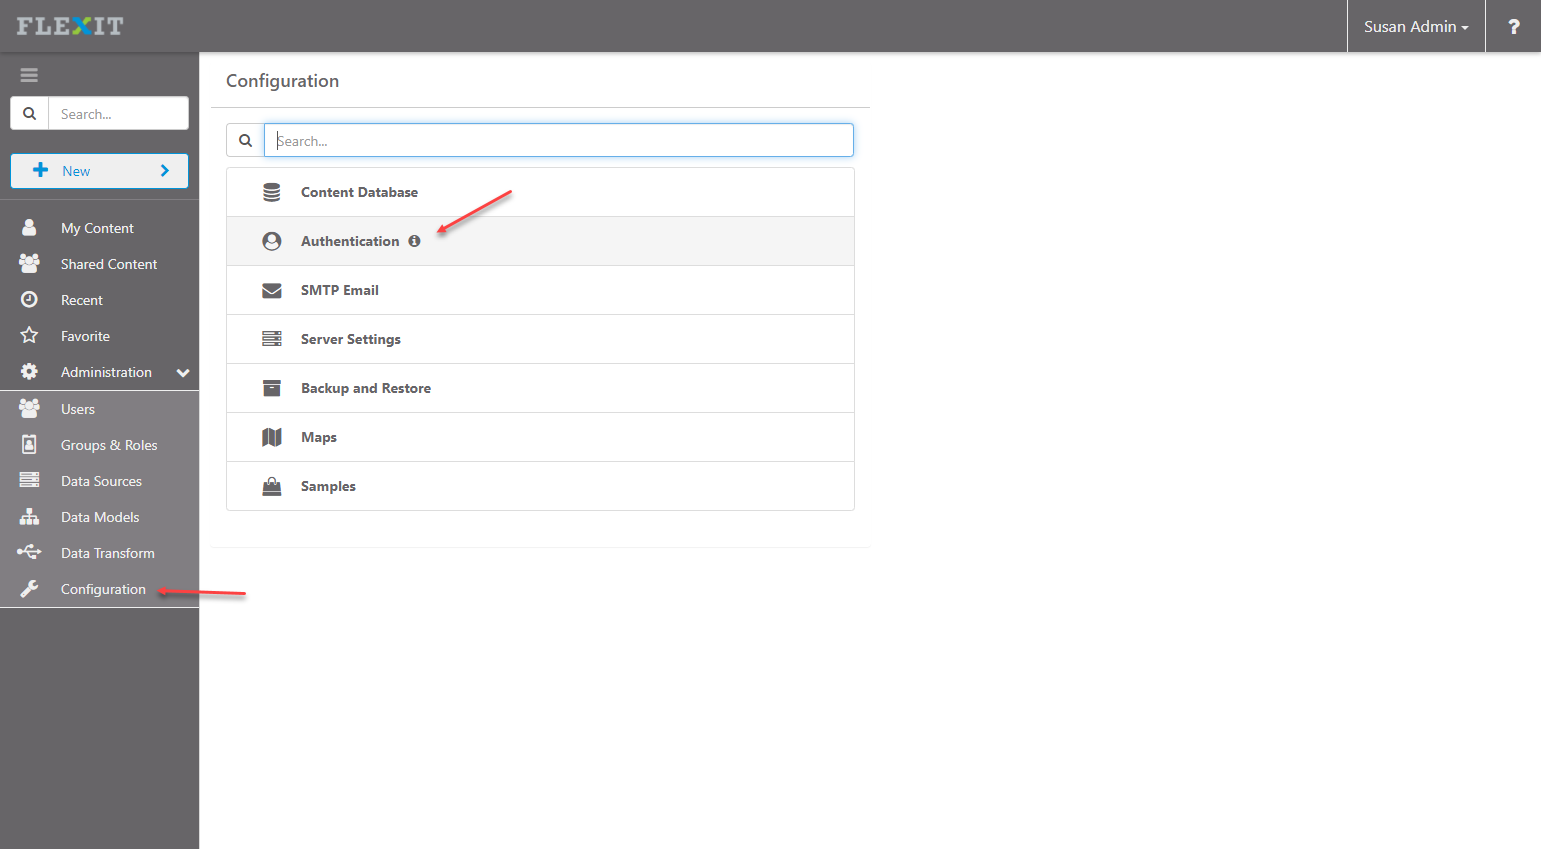
Select the “SAML 2.0” type from the drop-down and map the items from step 10 above into the FlexIt configuration
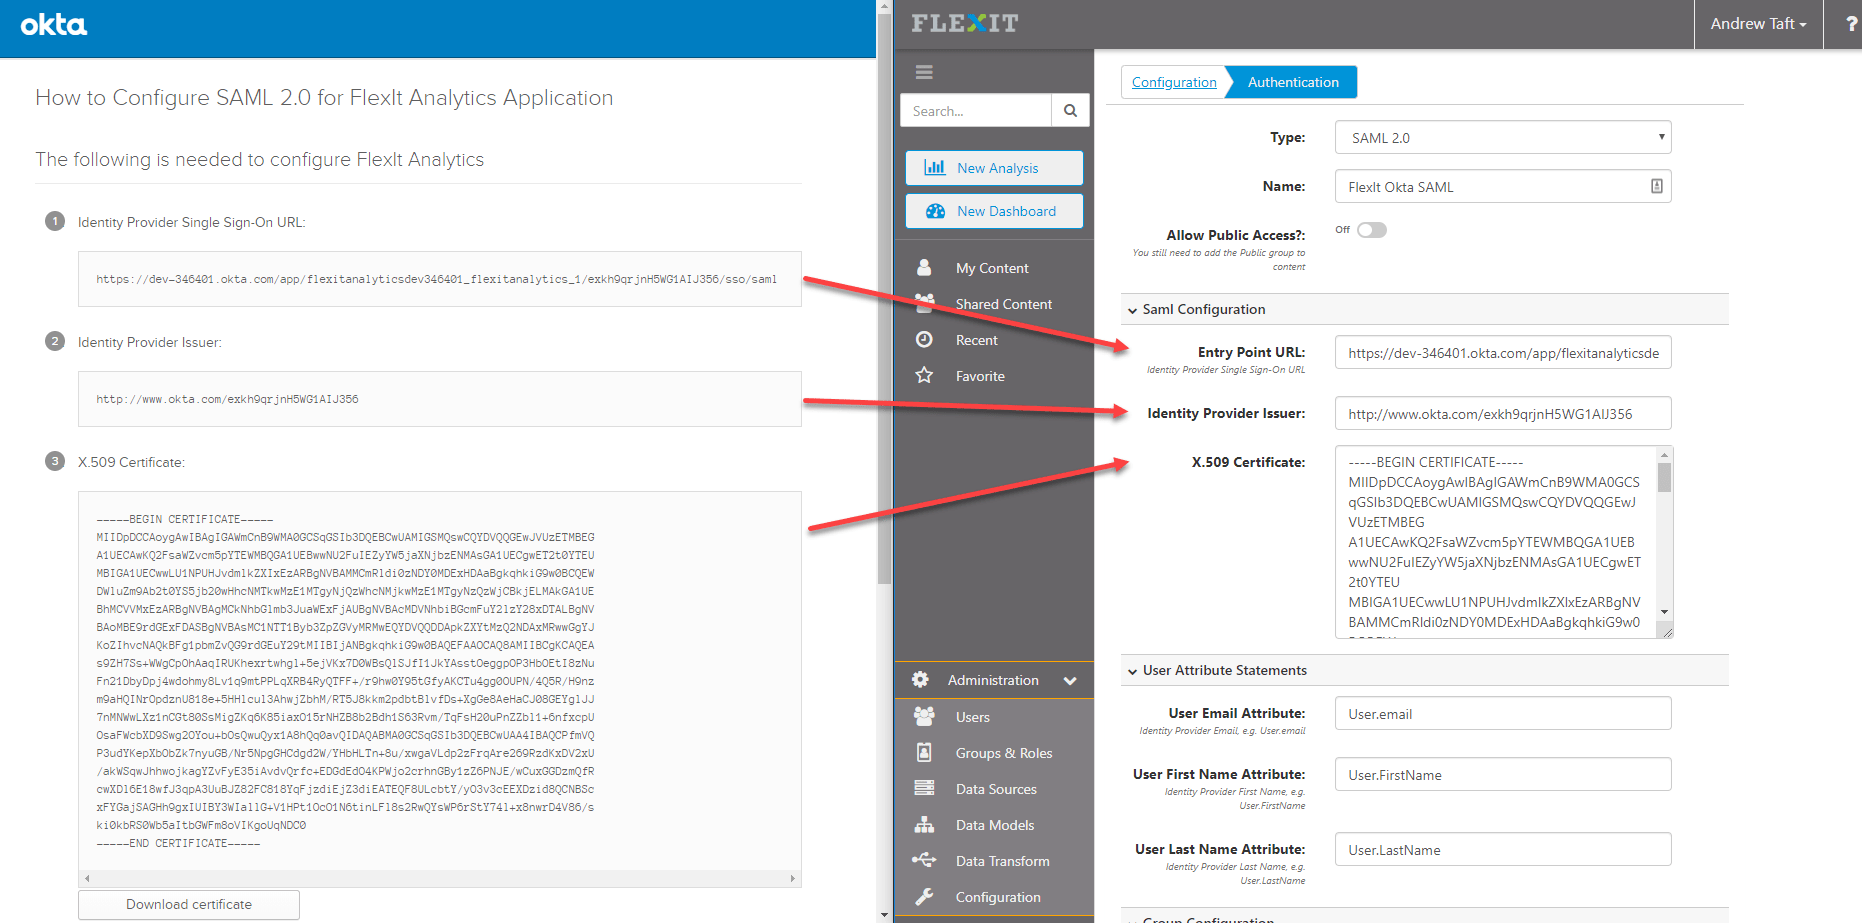
In the FlexIt configuration, the “User Attribute Statements” and “Group Attribute Statements” should match the names used in step 7 above. Note the following options:
Sync Provider Groups?
none - (default) do not use groups from the SAML provider. Only use FlexIt groups.
seed - FlexIt will use the mapped user group from the SAML provider ONLY on the first login. After the first time logging into FlexIt, any changes to the SAML provider groups will not persist to FlexIt.
sync - FlexIt will always use the Okta groups. If the groups change in the SAML provider, then the groups in FlexIt will also be updated with the new group mapping.
seed and sync rely on the Group Mapping entries that map a FlexIt group name to the SAML provider group name
Default Group defaults to “none”. If a user is assigned to the FlexIt Analytics application in Okta, but is not part of any Okta groups, you can automatically assign them to any group in FlexIt.
Click Save to finish the configuration in FlexIt. Okta SAML 2.0 authentication is now enabled.