Deploy FlexIt
FlexIt can be deployed to the cloud or downloaded and installed on your local servers on premises (a.k.a "on prem"). Click Get FlexIt below to get started with a cloud or on-prem deployment.
Cloud Deployment
Spin up a 100% free cloud deployment on Heroku for small deployments or proof-of-concepts. When you're ready to scale up, contact us to help with your Amazon Web Services deployment.
Get FlexItOn Premises
Before you begin
Download FlexIt
You need to have the FlexIt installer for the applicable operating system. If you have not already downloaded the FlexIt installer, please download now:
Get FlexItSystem Requirements
Operating System
- Windows (Server or Personal)
- Linux
- Mac OS X is not currently supported
Database Server
The FlexIt server needs a database to store content. By default, it comes with an enterprise-level PostgreSQL database, but you can change this to any of the following supported databases.
- PostgreSQL
- MySQL
- Microsoft SQL Server
- MariaDB
- Oracle
Install FlexIt
Installing FlexIt is quick and easy.
Download the installer if you have not already done so: Download Now
Locate the downloaded FlexIt installer executable, often in your “Downloads” folder
Run the executable as “administrator” privileges
Linux Only – in some instances, you may need to mark the .run file as executable and run as root with the sudo command:
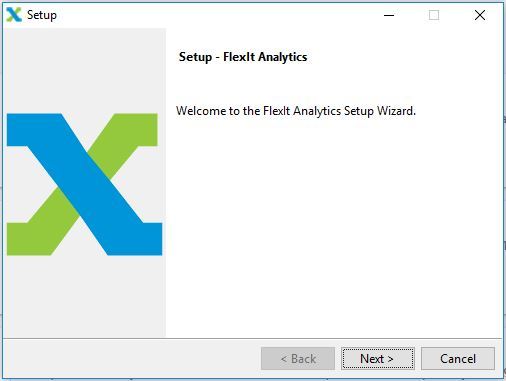
chmod +x flexit-2018.09.01-linux-x64-installer.runsudo ./flexit-2018.09.01-linux-x64-installer.runYou should now see the setup screen

If you want to use a different database than the included Postgres DB, or change other config options, then go to “Customized Setup” below. Otherwise you can click “Next” through the rest of the screens.
At the last step, you’ll see a URL link to open FlexIt. You can click that link or paste it into your preferred browser.
Note: The default URL is http://localhost:3030
Customized Setup
If you want to customize your FlexIt installation and configuration, here are your options as you progress through the setup process
Installation Directory – you can change this setting to install FlexIt Analytics anywhere you would like.
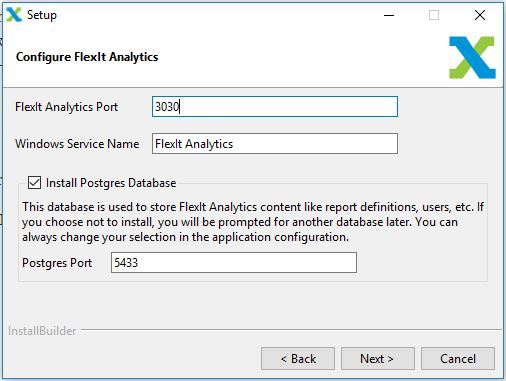
Configure FlexIt Analytics – this is where you set port, service name, and content database (described below)

- FlexIt Analytics Port: this is the port that FlexIt runs on. If another process is using this port, the installer will force you to pick another port.
You can change the port later from Administration > Configuration > Server Settings or enable HTTPS (see how).
- Windows Service Name (Windows only): when the machine you install FlexIt on restarts, the Windows Service makes sure that FlexIt is also up and running.
- Install Postgres Database: FlexIt needs a database to store content (i.e. reports, dashboards, users, etc.). If you want to use the default PostgreSQL 10 database server (high performing enterprise-level), leave this checked and select a port (default: 5433). If you do not check this, FlexIt will ask you to configure another database later. As mentioned above, that database must be one of the following: Microsoft SQL Server, PostgreSQL, MySQL, MariaDB, or Oracle.
- FlexIt Analytics Port: this is the port that FlexIt runs on. If another process is using this port, the installer will force you to pick another port.
Finish – click “Next” on the rest of the screens and finish the installation
Managing FlexIt (Post Installation)
Modify Configuration
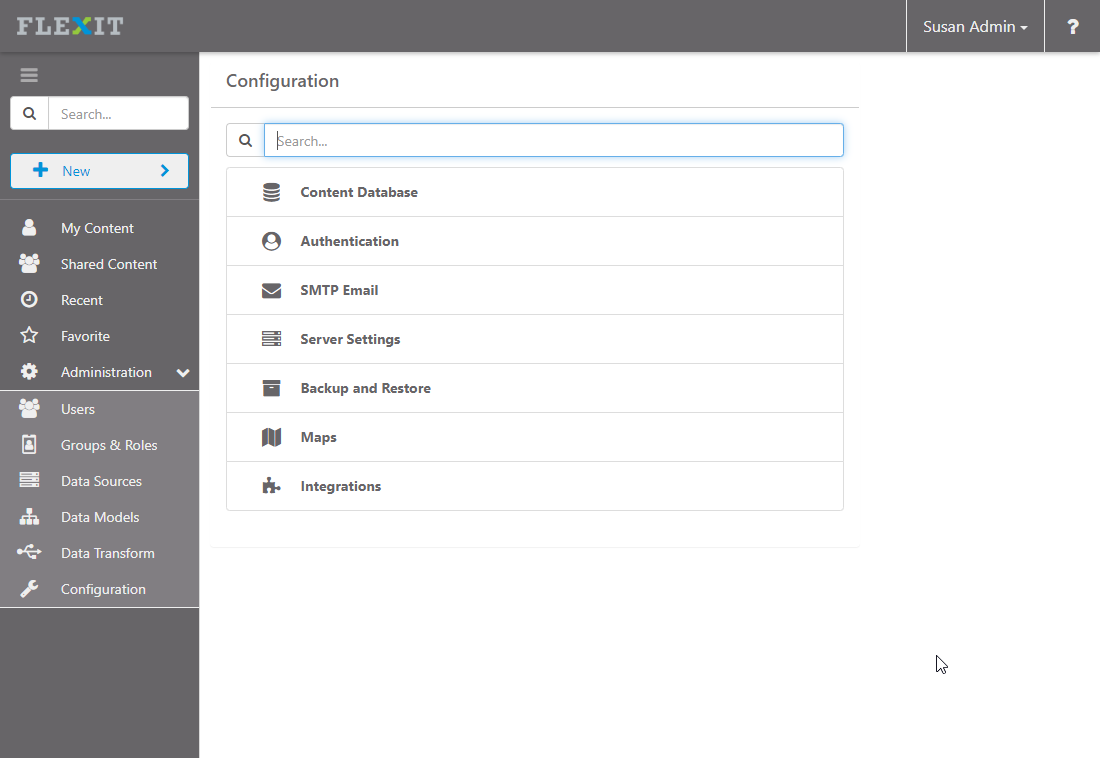
You can modify the FlexIt configuration from within the web application as an Admin at any point, as shown below. The database you chose to store content can be configured under “Content Database”. The server port and other settings can be configured under “Server Settings”. For detailed documentation on these and other configuration settings, see the Administration guide

Start/Stop FlexIt Server
It is best to use the FlexIt service, which starts and stops both the FlexIt server and the default PostgreSQL server (if installed).
Windows
Open Windows Service manager and look for the "FlexIt Analytics" service
Linux
Use systemctl, which manages systemd services, as shown below:
Any OS
You can also start or stop the FlexIt service manually using scripts in the “[FlexIt Install Directory]/bin” directory:
- Start FlexIt: run the
start_flexitscript - Stop FlexIt: run the
stop_flexitscript
Modify Windows Service
In Windows installations, FlexIt comes with the NSSM service manager executable so that you can easily customize or remove the FlexIt Windows Service. You can use NSSM.exe in any documented way to add/remove/modify any service. In most instances, this is not necessary since FlexIt automatically creates a new service on installation and removes that same service on uninstallation.
Default PostgreSQL Database
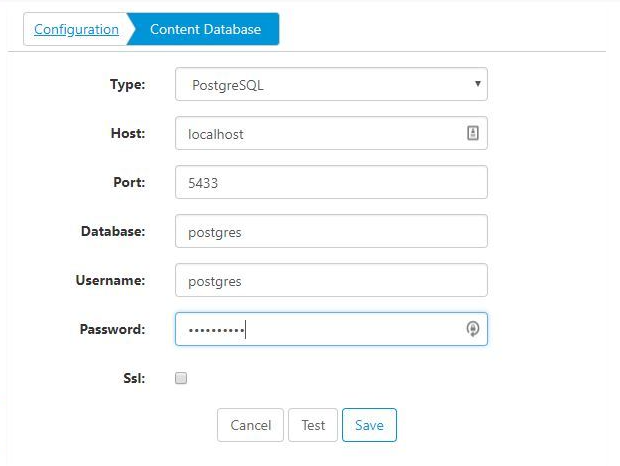
The default database where FlexIt stores content (users, reports, dashboards, etc.) is a PostgreSQL database. This is a highly-scalable enterprise-level database that can be used in a production environment. It is installed under the “[FlexIt Install Directory]/pgsql” directory and by default uses a trust account setting. If you decide to modify or migrate your Content Database at any time, you can change the settings in FlexIt under “Administration -> Configuration -> Content Database”, shown below:

Uninstalling FlexIt
In the directory that FlexIt was installed, run the “uninstall” executable.
Important - this will remove FlexIt, the default PostgreSQL database, and all other content. Make sure you have backed up everything if you may want to restore it in the future.
Upgrade Installation
If you are upgrading to a newer version and already have FlexIt installed, you can simply install the new version over the existing version. Any files under the FlexIt Home directory that are overwritten will be placed into a backup folder.
Important - Back up the content store database or export the content to save all your content before upgrading
Upgrade AWS Marketplace EC2 Instance
Download the latest Linux installer from https://flexitanalytics.com/download/
In the example below,
54.159.37.23is the example EC2 public IPv4 address
Follow these steps
- Copy the installer from local to the EC2 instance
- Log into the EC2 instance
- Run the installer
Click through and select 1) for Upgrade when prompted (do not pay attention to the url message at the end)
Reboot EC2 instance
Warning If you do NOT have Elastic IP configured on the EC2 instance and stop the instance, the public IPv4 will change. If this happens, you will need to
cd /var/lib/cloud/scripts/per-instanceand thensudo ./update_nginx_listener.shto update the NGINX server_name. To avoid this, you can either "Reboot" from the AWS console or callsudo rebooton the instance.
- Open FlexIt URL and check version in top right Help > About